Deploying to AWS on a Single EC2 Instance
Estimated Time
Starting from scratch, deploying Catena to AWS on a single EC2 instance is estimated to take 30-45 minutes.
What Is Amazon EC2?
EC2 stands for Elastic Cloud Compute. It is Amazon's offering for creating and running virtual machines, called instances, in the cloud.
What is an Amazon VPC?
VPC stands for Virtual Private Cloud. It is an Amazon service that allows users to create isolated virtual networks within the Amazon Web Services (AWS) cloud. It provides control over network configuration, including IP address management, subnets, and security settings for AWS resources.
Where can Catena be Deployed?
Catena can be deployed into any AWS region that supports Amazon EC2 instances running in an Amazon VPC. AWS Regions that support both Amazon EC2 and Amazon VPC include US East (N. Virginia), US West (N. California), AWS GovCloud (US-East), AWS GovCloud (US-West), Asia Pacific (Hong Kong), and South America (São Paulo).
Deployment Instructions
1. Obtain Catena source code
Catena is distributed via Git. Instructions for installing Git can be found here.
To gain access to the Catena Source, please contact us to obtain a license. Once you have access, clone Catena to your machine.
git clone git@github.com:CatenaTools/catena-tools-core.gitTo deploy to AWS, you will also need to clone Catena's Infrastructure as Code repository.
git clone git@github.com:CatenaTools/infrastructure.git2. Preparations
2a. Create an AWS Account
To create an AWS account, follow these instructions from AWS.
2b. Create IAM Policy
We'll be using a scoped IAM policy specifically for deployment in order to follow Least Privilege guidelines. The catena_deploy user will have this CatenaDeploymentPolicy policy attached.
- Log in to your AWS account that was created in the previous step.
- Navigate to Access Management -> Policies
- Create Policy
- Use the
JSONEditor to paste in the custom policy below. - Hit Next
- Give the policy a name like
CatenaDeploymentPolicy - Finish by creating the policy, then proceed to the next section.
Replace the following placeholders before attaching the policy:
| Placeholder | Example | Description |
|---|---|---|
<ACCOUNT_ID> | 144518428993 | AWS account ID where Catena will be deployed |
<REGION> | us-east-1 | AWS region used for the deployment |
<TERRAFORM_STATE_BUCKET> | catena-terraform-state | SS3 bucket used for Terraform remote state |
<TERRAFORM_STATE_PREFIX> | catena-core/* | S3 prefix Terraform may list while checking state and lock objects |
<TERRAFORM_STATE_KEY> | catena-core/terraform.tfstate | Exact path used for this deployment’s Terraform state |
<CATENA_EC2_ROLE_NAME> | catena-gameserver-ec2-role | IAM role name Terraform creates or uses for the Catena EC2 instance |
<CATENA_EC2_INSTANCE_PROFILE_NAME> | catena-gameserver-ec2-instance-profile | IAM instance profile name Terraform creates or uses for the Catena EC2 instance |
{
  "Version": "2012-10-17",
  "Statement": [
    {
      "Sid": "TerraformStateBucketList",
      "Effect": "Allow",
      "Action": [
        "s3:ListBucket"
      ],
      "Resource": "arn:aws:s3:::<TERRAFORM_STATE_BUCKET>",
      "Condition": {
        "StringLike": {
          "s3:prefix": [
            "<TERRAFORM_STATE_PREFIX>"
          ]
        }
      }
    },
    {
      "Sid": "TerraformStateObjectAccess",
      "Effect": "Allow",
      "Action": [
        "s3:GetObject",
        "s3:PutObject",
        "s3:DeleteObject"
      ],
      "Resource": "arn:aws:s3:::<TERRAFORM_STATE_BUCKET>/<TERRAFORM_STATE_KEY>"
    },
    {
      "Sid": "TerraformStateLockAccess",
      "Effect": "Allow",
      "Action": [
        "s3:GetObject",
        "s3:PutObject",
        "s3:DeleteObject"
      ],
      "Resource": "arn:aws:s3:::<TERRAFORM_STATE_BUCKET>/<TERRAFORM_STATE_KEY>.tflock"
    },
    {
      "Sid": "ReadEC2State",
      "Effect": "Allow",
      "Action": [
        "ec2:Describe*",
        "ec2:GetConsoleOutput"
      ],
      "Resource": "*"
    },
    {
      "Sid": "ManageCatenaEC2VpcAndNetworkResources",
      "Effect": "Allow",
      "Action": [
        "ec2:CreateVpc",
        "ec2:DeleteVpc",
        "ec2:ModifyVpcAttribute",
        "ec2:CreateSubnet",
        "ec2:DeleteSubnet",
        "ec2:ModifySubnetAttribute",
        "ec2:CreateInternetGateway",
        "ec2:DeleteInternetGateway",
        "ec2:AttachInternetGateway",
        "ec2:DetachInternetGateway",
        "ec2:CreateRouteTable",
        "ec2:DeleteRouteTable",
        "ec2:CreateRoute",
        "ec2:DeleteRoute",
        "ec2:AssociateRouteTable",
        "ec2:DisassociateRouteTable",
        "ec2:CreateSecurityGroup",
        "ec2:DeleteSecurityGroup",
        "ec2:AuthorizeSecurityGroupIngress",
        "ec2:AuthorizeSecurityGroupEgress",
        "ec2:RevokeSecurityGroupIngress",
        "ec2:RevokeSecurityGroupEgress",
        "ec2:ModifySecurityGroupRules",
        "ec2:UpdateSecurityGroupRuleDescriptionsIngress",
        "ec2:UpdateSecurityGroupRuleDescriptionsEgress"
      ],
      "Resource": "*"
    },
    {
      "Sid": "ManageCatenaEC2InstanceAndAddressResources",
      "Effect": "Allow",
      "Action": [
        "ec2:RunInstances",
        "ec2:TerminateInstances",
        "ec2:StartInstances",
        "ec2:StopInstances",
        "ec2:RebootInstances",
        "ec2:AllocateAddress",
        "ec2:AssociateAddress",
        "ec2:DisassociateAddress",
        "ec2:ReleaseAddress",
        "ec2:ImportKeyPair",
        "ec2:CreateKeyPair",
        "ec2:DeleteKeyPair",
        "ec2:CreateTags",
        "ec2:DeleteTags"
      ],
      "Resource": "*"
    },
    {
      "Sid": "ManageCatenaRoute53Records",
      "Effect": "Allow",
      "Action": [
        "route53:GetHostedZone",
        "route53:ListHostedZones",
        "route53:ListHostedZonesByName",
        "route53:ListResourceRecordSets",
        "route53:ChangeResourceRecordSets"
      ],
      "Resource": "*"
    },
    {
      "Sid": "ManageCatenaEc2IamRoleAndInstanceProfile",
      "Effect": "Allow",
      "Action": [
        "iam:CreateRole",
        "iam:DeleteRole",
        "iam:GetRole",
        "iam:TagRole",
        "iam:UntagRole",
        "iam:UpdateAssumeRolePolicy",
        "iam:PutRolePolicy",
        "iam:GetRolePolicy",
        "iam:DeleteRolePolicy",
        "iam:ListRolePolicies",
        "iam:CreateInstanceProfile",
        "iam:DeleteInstanceProfile",
        "iam:GetInstanceProfile",
        "iam:TagInstanceProfile",
        "iam:UntagInstanceProfile",
        "iam:AddRoleToInstanceProfile",
        "iam:RemoveRoleFromInstanceProfile"
      ],
      "Resource": [
        "arn:aws:iam::<ACCOUNT_ID>:role/<CATENA_EC2_ROLE_NAME>",
        "arn:aws:iam::<ACCOUNT_ID>:instance-profile/<CATENA_EC2_INSTANCE_PROFILE_NAME>"
      ]
    },
    {
      "Sid": "PassOnlyCatenaEc2Role",
      "Effect": "Allow",
      "Action": [
        "iam:PassRole"
      ],
      "Resource": "arn:aws:iam::<ACCOUNT_ID>:role/<CATENA_EC2_ROLE_NAME>",
      "Condition": {
        "StringEquals": {
          "iam:PassedToService": "ec2.amazonaws.com"
        }
      }
    },
    {
      "Sid": "UseEC2InstanceConnectForCatenaHost",
      "Effect": "Allow",
      "Action": [
        "ec2-instance-connect:SendSSHPublicKey"
      ],
      "Resource": "arn:aws:ec2:<REGION>:<ACCOUNT_ID>:instance/*",
      "Condition": {
        "StringEquals": {
          "ec2:osuser": "ubuntu"
        }
      }
    }
  ]
}
This policy is a starting point for the documented single-EC2 deployment. Your organization may need to adjust it based on the exact Terraform configuration, naming conventions, hosted zone setup, and security requirements.
If Terraform reports an access denied error during terraform plan or terraform apply, review the missing action and update the policy intentionally rather than attaching AdministratorAccess.
2c. Create Credentials
Do not use the AWS account root user!
Do not use the AWS account root user to deploy or operate Catena. The root user has unrestricted access to all AWS services and resources in the account, including billing and account-level settings. Catena does not require root user privileges for deployment or operation.
Log in to your AWS account that was created in the previous step.
Navigate to the Identity and Access Management (IAM) portion of the AWS console.
Navigate to the Users section of the IAM console.
Select "Create user".
Name your user. For the purposes of these instructions, we'll call ours "catena_deployment".
- Leave the "Provide user access to the AWS Management Console" option unchecked. This user will only require programmatic access to AWS.
On the next step, select "Attach policies directly"
- In the policies list, select the
CatenaDeploymentPolicyyou made in the previous step.
- In the policies list, select the
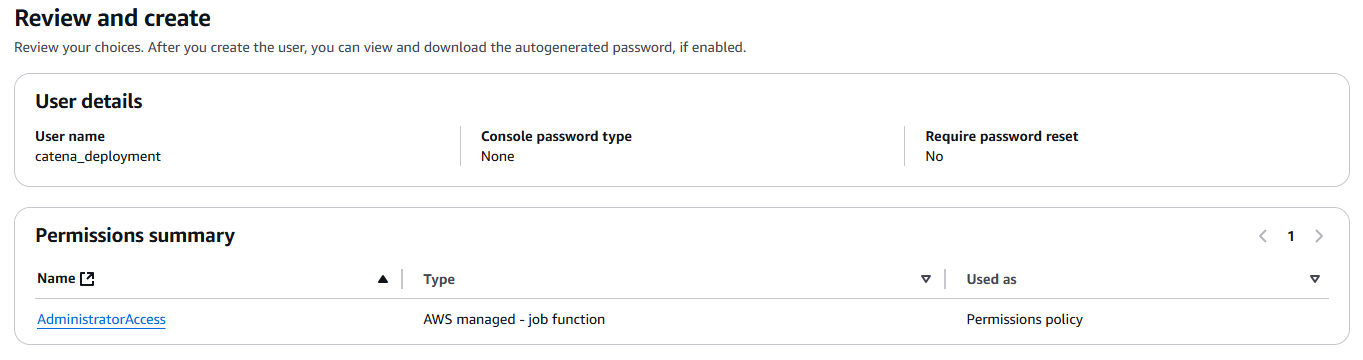
Proceed to the "Review and create" step. Your user should look something like this:
- Create the user
- Navigate to the user's details
- Select "Security credentials"
- Under the "Access keys" section, select "Create access key" to create secret keys for the "catena_deployment" IAM user
- These keys will later be passed to the AWS CLI (and by extension Terraform) so that the IAM user can authenticate as "catena_deployment" when provisioning resources in AWS.
- Select "Third-party service"
Note: AWS will recommend an alternative option. For ease, we will ignore this for the time being. Select "I understand the above recommendation and want to proceed to create an access key".
- Proceed to the next step and set an optional description tag
- Create your access key
Make note of your "Access key" and "Secret access key". You will need them later.
2d. Configure Your Domain
This guide requires using Route53 for your domain name.
- Register a new domain name or migrate an existing one
- If you need to register a new domain name, refer to this Route53 documenation about registering new domains.
- If you have an existing domain name, refer to this Route53 documentation about making Route53 the DNS service for an existing domain.
- If a "Hosted Zone" for your domain was not automatically created, refer to this Route53 documentation about creating hosted zones.
2e. Create an S3 Bucket
S3, or Simple Storage Service, is where Catena's Infrastructure as Code will store information about the state of your deployment. This state can be accessed by other developers on your team to ensure that updates they make to your infrastructure are compatible with what is currently deployed.
- Navigate to the S3 portion of the AWS console
- Click "Create bucket"
- Keep the default settings for all options
- Amazon S3 encrypts new objects at rest by default using server-side encryption with Amazon S3 managed keys, also known as SSE-S3.
- This will provide Encryption at Rest for your S3 bucket out of the box.
- Name your bucket. We'll call ours
catena-terraform-state
Make note of the AWS Region on this page. You will need it later.
2f. Install Dependencies
AWS CLI
The AWS CLI is a tool that allows users to manage AWS resources through the command line. With it, you can expose credentials to Terraform in future steps.
- To install the AWS CLI, refer to their installation documentation.
- Once the CLI is installed, add your credentials that you created earlier. We'll be adding them to a specific profile called "catena_deploy", but you can use whatever profile name you'd like.
- For a list of available regions you can provide when prompted for the default region, refer to available regions. We recommend using the same region your S3 bucket was created in.
aws configure --profile catena_deploy

# Interactive Input
# AWS Access Key ID [None]: <YOUR_ACCESS_KEY>
# AWS Secret Access Key [None]: <YOUR_SECRET_ACCESS_KEY>
# Default region name [None]: <YOUR_DEFAULT_REGION> (i.e. 'us-east-1', 'us-east-2', 'us-west-1', 'eu-west-1`, etc.)
# Default output format [None]: json
Note: This is going to store the credentials on your local machine in ~/.aws/credentials on Linux or %USERPROFILE%\.aws\credentials on Windows.
Terraform
Terraform is an infrastructure-as-code (IaC) tool created by HashiCorp. It allows users to develop, modify, and version infrastructure components. With it, we can deploy Catena to AWS in a handful of commands.
To install Terraform, refer to their installation documentation.
SSH Key
In order to deploy Catena, you will need to generate an SSH key.
# This will fail if the directory exists, but is safe to run to ensure it does exist
mkdir $env:USERPROFILE/.ssh/

# Generate the SSH Key
cd $env:USERPROFILE/.ssh/
ssh-keygen -t rsa -b 2048 -m PEM -f catena_deploy_key
This will generate two files, each of which will be used by Terraform when deploying Catena:
catena_deploy_key- Private Key that stays local to your machine, will be referenced later when deploying to the instance (see step 3 below).catena_deploy_key.pub- Public Key that Terraform uploads to AWS as an EC2 key pair duringterraform apply, provisioning SSH access to the instance it creates.
These files will be created on your local machine in %USERPROFILE%\.ssh\ on Windows or ~/.ssh/ on Linux
3. Deploy Catena
Now that you have everything prepped, it's time to actually deploy Catena.
This deployment configuration utilizes Dokku, which allows us to use Git to make deployments to our AWS Instance.
- Depending on your operating system, open Powershell, Terminal, or Command Line.
- Navigate to the Catena Infrastructure repository you cloned earlier.
- Navigate to the
aws/catena-core/directory. - Copy
backend.hcl.exampletobackend.hclandvars.tfvars.exampletovars.tfvars
copy backend.hcl.example backend.hcl
copy vars.tfvars.example vars.tfvars- Modify
backend.hclwith your S3 bucket name, the region of your S3 bucket, and the profile you created when configuring the AWS CLI - Modify
vars.tfvarswith your own values for your deployment.
A few of these configuration values are worth a closer look before you proceed:
ec2_instance_size
This deployment runs Catena Core, Redis, and SQLite together on a single instance, so sizing depends primarily on expected concurrent session load rather than heavy compute needs.
The default value set, t2.small (2 vCPU / 2 GB RAM), is suitable for development, staging, and small-scale production.
| Instance Size | vCPU / RAM | Recommended For |
|---|---|---|
t2.small (default) | 2 vCPU / 2 GB | Development, staging, small production workloads |
t2.medium | 2 vCPU / 4 GB | Early production with moderate concurrent sessions |
t2.large | 2 vCPU / 8 GB | Higher player counts or additional plugins/modules |
If you consistently exhaust CPU credits (visible via the CPUCreditBalance CloudWatch metric once deployed), move up a size.
ec2_ami
The default value is the Ubuntu 22.04 LTS AMI ID for us-east-1. AMI IDs are region-specific — if you set aws_region to anything other than us-east-1, you'll need to find the matching Ubuntu 22.04 LTS AMI ID for your chosen region (e.g. via the AWS AMI Locator or run aws ec2 describe-images in the CLI), or Terraform will fail to find that AMI in your target region.
Root Volume Size
The EC2 instance's root EBS volume is fixed at 50 GB and is not currently exposed as a vars.tfvars variable. That 50 GB covers the OS, Dokku, your application, and SQLite database growth for most basic deployments.
If you need a different size, edit the root_block_device size value directly in main.tf (in the aws/catena-core module) before running terraform apply. EBS also supports resizing an existing volume without downtime if you need to grow it later — see AWS's guide on modifying EBS volumes.
- Initialize Terraform
terraform init -backend-config="backend.hcl"- (Optional) Run a Terraform plan. This will preview all of the AWS resources that are about to be provisioned.
terraform plan -var-file="vars.tfvars"- Run a Terraform apply. This will preview all of the AWS resource that are about to be provisioned, and prompt you if you'd like to proceed.
terraform apply -var-file="vars.tfvars"You should see a long list of output, with something resembling the following code block at the end.
Note: This is just example output.
Apply complete! Resources: 26 added, 0 changed, 0 destroyed.

Outputs:

add_dokku_remote_command = "git remote add dokku dokku@catenatools.com:platform"
catena_url = "https://platform.catenatools.com"
ec2_instance_id = "i-07f061200fdc6daf9"
ec2_instance_ssh_command = "aws ec2-instance-connect ssh --os-user ubuntu --instance-id i-07f061200fdc6daf9 --profile catena_deploy"
ec2_ip = "3.218.158.134"
is_healthy = "https://platform.catenatools.com/api/v1/node_inspection/is_healthy"
powershell_deploy_command = "$env:GIT_SSH_COMMAND='ssh -i ~/.ssh/catena_deploy_key -o IdentitiesOnly=yes'; git push dokku main"
unix_deploy_command = "GIT_SSH_COMMAND='ssh -i ~/.ssh/catena_deploy_key -o IdentitiesOnly=yes' git push dokku main"
windows_deploy_command = "set \"GIT_SSH_COMMAND=ssh -i ~/.ssh/catena_deploy_key -o IdentitiesOnly=yes\" && git push dokku main"If this step fails during the (remote-exec) step, you should tear down your resources and re-do step 9.
terraform destroy -var-file="vars.tfvars"- Navigate to the Catena Core repository you cloned earlier.
- Use the
add_dokku_remote_commandthat was output from when you ranterraform applyto add the Dokku remote.
git remote add dokku dokku@<your-url>:platformUse the appropriate command that was output from when you ran
terraform applyto deploy Catena (this may take a while)- Options Include:
powershell_deploy_commandif you are using Powershellwindows_deploy_commandif you are using Windows Command Promptunix_deploy_commandif you are using a Unix Based Command Prompt
- When prompted if you'd like to continue connecting, select "yes"
- Options Include:
Check that Catena is running, by navigating to the URL specified in the
is_healthyoutput from when you ranterraform apply
How Does This Work?
Terraform creates an array of resources in your AWS account. These include:
- Identity and Access Management (IAM) roles necessary for your EC2 instance to operate
- A Virtual Private Cloud (VPC) to house your EC2 instance in its own dedicated network
- Subnets to define IP address ranges that an EC2 instance can use
- An Internet Gateway to allow our VPC to communicate with the outside internet
- A Security Group containing rules that restrict inbound traffic to what is necessary and open outbound traffic to allow communication with the outside internet
- An Elastic IP that gives our EC2 instance a static IPv4 address
- Route53 records that update DNS resolution for our deployment
- An EC2 Instance that Catena is deployed to
- An encrypted Amazon EBS volume used by that EC2 instance for operating system, application, and local data-store files.
- This deployment encrypts its local database files at rest by storing them on an encrypted Amazon EBS volume.
Catena stores data in both it's SqlLite and Redis running in it's EC2 instance. The following services store data that may be considered sensitive:
| Catena Service | Storage Location |
|---|---|
| CatenaAccounts | SqlLite |
| CatenaApiKeys | SqlLite |
| CatenaPlatformAuth | SqlLite |
| CatenaSessions | SqlLite / Redis |
If you would like to see the configuration for each of these resources, you can look through the aws/catena-core/main.tf file in the Catena Infrastructure repository for more details.
Once these resources are provisioned, an init script is run on the EC2 instance that:
- Installs Dokku
- Configures Dokku to recognize your domain name
- Installs LetsEncrypt, to enable SSL (generates a cert for your deployment)
- Creates a Catena app within Dokku
- Configures a few necessary environment variables
- Exposes this app to the outside world
- Installs Redis and runs it
- Configures persistent database storage using SQLite on the encrypted EBS volume
If you would like to see the details for this init script, you can view it at the aws/catena-core/ec2/templates/init.sh.tftpl file in the Catena Infrastructure repository for more details.
The final step is the git push that you manually complete, pushing a version of Catena to your instance. Dokku builds the source and runs it.
What Next?
By default, Catena is run with an assortment of plugins enabled. We recommend exploring what is possible with our included plugins before experimenting with swapping them out for other modules.