Catena - AWS FlexMatch
AWS FlexMatch is responsible for grouping players together to form games or matches. Catena's integration into FlexMatch currently supports FlexMatch's "standalone" configuration, meaning that it only supports making matches and does not support provisioning game servers via AWS GameLift.
If you would like to learn more about how Catena handles dedicated game servers, refer to the Match Broker documentation.
Engine Integration
This page is dedicated to explaining key concepts for matchmaking in Catena, utilizing AWS FlexMatch. If you are interested in how to integrate matchmaking within a particular game engine, refer to your engine's documentation.
What is AWS FlexMatch?
AWS FlexMatch, also known as "Amazon GameLift Servers FlexMatch" is Amazon's offering for matchmaking players.
Getting Started
1. Obtain Catena source code
Catena is distributed via Git. Instructions for installing Git can be found here.
To gain access to the Catena Source, please contact us to obtain a license. Once you have access, clone Catena to your machine.
git clone git@github.com:CatenaTools/catena-tools-core.gitTo configure FlexMatch, you will also need to clone Catena's Infrastructure as Code repository.
git clone git@github.com:CatenaTools/infrastructure.git2. Preparations
2a. Create an AWS Account
To create an AWS account, follow these instructions from AWS.
2b. Create Credentials
Log in to your AWS account that was created in the previous step.
Navigate to the Identity and Access Management (IAM) portion of the AWS console.
Navigate to the Users section of the IAM console.
Select "Create user".
Name your user. For the purposes of these instructions, we'll call ours "catena_matchmaking".
- Leave the "Provide user access to the AWS Management Console" option unchecked. This user will only require programmatic access to AWS.
On the next step, select "Attach policies directly"
- In the policies list, select the
CatenaDeploymentPolicyyou made in the previous step.
- In the policies list, select the
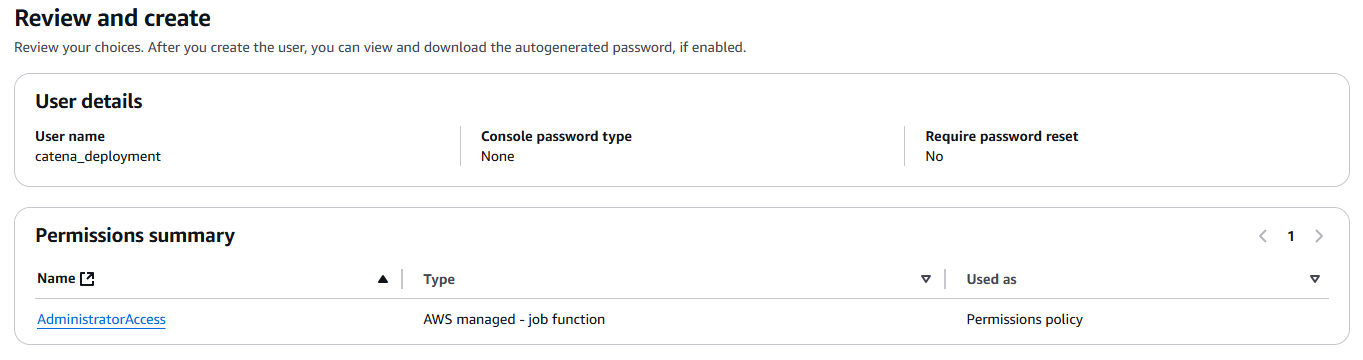
Proceed to the "Review and create" step. Your user should look something like this:
- Create the user
- Navigate to the user's details
- Select "Security credentials"
- Under the "Access keys" section, select "Create access key" to create secret keys for the "catena_matchmaking" IAM user
- These keys will later be passed to the AWS CLI (and by extension Terraform) so that the IAM user can authenticate as "catena_matchmaking" when provisioning resources in AWS.
- Select "Third-party service"
Note: AWS will recommend an alternative option. For ease, we will ignore this for the time being. Select "I understand the above recommendation and want to proceed to create an access key".
- Proceed to the next step and set an optional description tag
- Create your access key
Make note of your "Access key" and "Secret access key". You will need them later.
2c. Install Dependencies
AWS CLI
The AWS CLI is a tool that allows users to manage AWS resources through the command line. With it, you can expose credentials to Terraform in future steps.
- To install the AWS CLI, refer to their installation documentation.
- Once the CLI is installed, add your credentials that you created earlier. We'll be adding them to a specific profile called "catena_gamelift", but you can use whatever profile name you'd like.
- For a list of available regions you can provide when prompted for the default region, refer to available regions. We recommend using the same region your S3 bucket was created in.
aws configure --profile catena_gamelift

# Interactive Input
# AWS Access Key ID [None]: <YOUR_ACCESS_KEY>
# AWS Secret Access Key [None]: <YOUR_SECRET_ACCESS_KEY>
# Default region name [None]: <YOUR_DEFAULT_REGION> (i.e. 'us-east-1', 'us-east-2', 'us-west-1', 'eu-west-1`, etc.)
# Default output format [None]: json
Terraform
Terraform is an infrastructure-as-code (IaC) tool created by HashiCorp. It allows users to develop, modify, and version infrastructure components. With it, we can deploy Catena to AWS in a handful of commands.
To install Terraform, refer to their installation documentation.
3. Configure FlexMatch
Now that you have everything prepped, it's time to configure FlexMatch in your AWS account. We will be using Terraform to configure the various components necessary for FlexMatch to operate. These include:
Matchmaking Ruleset(s)
FlexMatch Rulesets define your game's team structure, size, and how to group players together for the best possible match.
Matchmaking Configuration(s)
FlexMatch Configurations expose matchmaking functionality to the outside world. These are how Catena makes matchmaking requests to AWS.
Simple Notification Service (SNS) Topic
AWS SNS gives FlexMatch a place to post matchmaking events as they occur (i.e. match created).
Simple Queue Service (SQS) Queue
AWS SQS gives applications a way to subscribe to events that are sent to SNS topics. This is how Catena listens for matchmaking events for specific matchmaking tickets.
3a. Provision Resources
- Navigate to the Catena Infrastructure repository you cloned earlier.
- Navigate to the
aws/flex-match/directory - Initialize Terraform
terraform initIf you would like to customize the matchmaking queues that are available, edit the
matchmaking_queuesvariable invariables.tf. For every queue name, you will need to define a corresponding ruleset in therule_sets/directory. For more information on rule sets, refer to the match rulesets documentation from Amazon.(Optional) Run a Terraform plan. This will preview all of the AWS resources that are about to be provisioned.
terraform plan- Run a Terraform apply. This will preview all of the AWS resource that are about to be provisioned, and prompt you if you'd like to proceed.
terraform applyYou should see a long list of output, with something resembling the following code block at the end.
Note: This is just example output.
Apply complete! Resources: 6 added, 0 changed, 0 destroyed.

Outputs:

sqs_queue_url = "https://sqs.us-east-1.amazonaws.com/000000000000/matchmaking-events"- Keep note of the
sqs_queue_urlthat it output, as it will be used to configure your running instance of Catena.
3b. Configure Catena
Once you have your resources provisioned, you can configure Catena. Catena is configured using appsettings files in catena-tools-core. You will need the following items for Catena to work with FlexMatch:
{
    "Catena": {
        ...
        "Matchmaker": {
            "FlexMatch": {
                "SQSQueueUrl": "<your_sqs_url_from_terraform_output>",
                "GameLiftConfig": {
                    "Profile": "<your_aws_profile_from_aws_cli>",
                    "Region": "<your_aws_region_from_aws_cli>"
                }
            }
        }
        ...
    },
    "PreferredImplementations": {
        ...
        "ICatenaMatchmaker": "!AwsFlexMatch"
        ...
    }
}
Alternatively, you can expose your access key/secret key directly, though you should not check these values into source control.
{
    "Catena": {
        ...
        "Matchmaker": {
            "FlexMatch": {
                "SQSQueueUrl": "<your_sqs_url_from_terraform_output>",
                "GameLiftConfig": {
                    "AccessKey": "<your_aws_access_key>",
                    "SecretKey": "<your_aws_secret_key>",
                    "Region": "<your_aws_region_from_aws_cli>"
                }
            }
        }
        ...
    },
    "PreferredImplementations": {
        ...
        "ICatenaMatchmaker": "!AwsFlexMatch"
        ...
    }
}
How The Matchmaker Works
Tickets
The Catena Matchmaker accepts matchmaking tickets from players. Tickets may be submitted by a player for themselves if matchmaking alone, or may be submitted by a party leader on behalf of the entire party if partied up. These tickets can include metadata about the player(s), the party they are in, or the desired match properties.
Creating a ticket for matchmaking is done by submitting an Entity to StartMatchmaking.
An Entity is a special Catena data type used for passing and storing dynamic data in Catena without having to define rigid data types.
Tickets will be sorted into queues based on the queue_name that is provided in the ticket. This queue_name is a requirement.
An example ticket, in its simplest form, looks like this:
{
    "entity": {
        "id": "{{account-id}}",
        "entity_type": "ENTITY_TYPE_ACCOUNT",
        "entities": [],
        "metadata": {
            "queue_name": {
                "string_payload": "solo"
            }
        }
    }
}
Note: If you are using a Catena SDK in your game engine, ticket generation is done on your behalf.
The queue_name you provide in your ticket will be used to determine the FlexMatch Matchmaking Configuration to use when entering matchmaking.
Events
As matchmaking tickets progress through Catena and ultimately through FlexMatch, events are emitted that either game clients or other Catena Services who are subscribed can ingest.
- A
MatchmakingStatusUpdateEventis emitted to players on a given ticket periodically as the ticket progresses through the system. Status update types include:MATCHMAKING_STATUS_UPDATE_TYPE_IN_PROGRESSMATCHMAKING_STATUS_UPDATE_TYPE_COMPLETEDMATCHMAKING_STATUS_UPDATE_TYPE_FAILEDMATCHMAKING_STATUS_UPDATE_TYPE_CANCELLEDMATCHMAKING_STATUS_UPDATE_TYPE_FINDING_SERVERMATCHMAKING_STATUS_UPDATE_MATCHMAKING_TIMED_OUT
- A
NewMatchEventis emitted when a match is formed, which other Catena Services can use to spin up a dedicated game server for the match, if necessary.
What Next?
Now that you have your matchmaker configured, it's time to integrate the matchmaker with your game engine.
Alternatively, if you are interested in matchmaking players into dedicated game servers, proceed to the game server documentation.